一、安装Spket
第一种方法:网上更新方式
1.插件首页:http://www.spket.com
2.插件名称:Spket IDE
3.更新连接(Update Site):http://www.spket.com/update/
更新安装方法:
1.[Help]-[Software Updates]-[Find and Install...]
2.[Search for new features to install] -> [Next]
3.[New Remote Site...] Name: "什么都行,spketjs" URL: http://www.spket.com/update/--> [Finish]
第二种方法:网上下载spket-1.6.16.jar破解版(目前最新版本)

1.如果你的JDK在1.6以上,可以直接双击spket-1.6.16.jar运行安装。

其它,使用命令行方式。(注意:自己切换命令行到spket-1.6.16.jar所在目录)

2.


myeclipse10 中无eclipse,要选中MyEclipse 10


至此,安装完成。
二、配置Spket
注意:如果在安装spket过程中,你的eclipse或者Myeclipse是打开的,请重启eclipse或者Myeclipse。以便初始化插件,下面才会在Preferences中看到 Spket选项。
基本步骤如下:
1)Window → Preferences → Spket ;

2)Spket → JavaScript Profiles → New, 输入“ExtJS”点击OK;

3)选择“ExtJS” 并点击“Add Library”然后在下拉条中选取“ExtJS”;

4)选择 “ExtJS”并点击“Add File”,然后在你的./ext-2.x/source目录中选取“ext.jsb” 文件;

5)设置新的ExtJS Profile,选中并点击“JavaScript Profiles” 对话框右手边的“Defalut”按钮;

下面这个操作,根据自己需要设置(可以全选)。

6)重启eclipse或者Myeclipse;
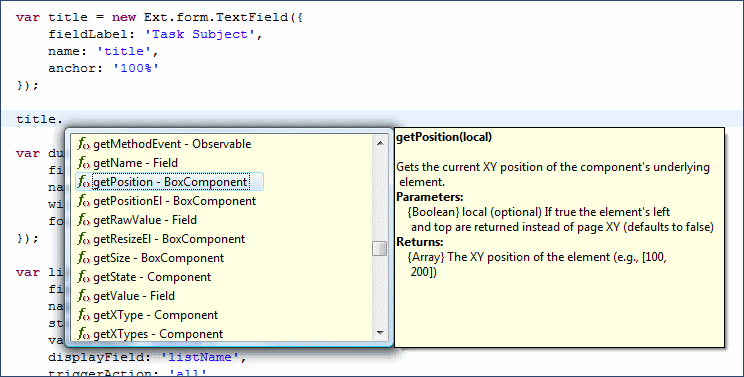
7)创建新的JS文件并输入: Ext这样就可设置Ext Code代码自动完成的功能。
效果如下:

