In order to make the Custom Rule accord with customer’s requirement, we have to build up a Validation mechanism.
Follow with the steps below. It will give you a good performance.
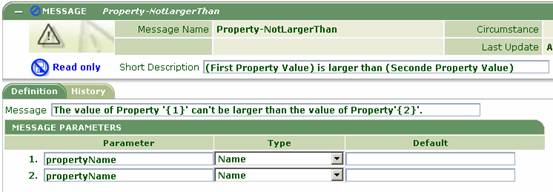
1. Create a new Rule-Message rule, apply to the rule you want to validate.
PRPC have hundreds of Messages, but those messages are defined for PRPC system exceptions or errors. If you throw errors which the PRPC system may throw, you can just use the Messages provided by PRPC. The screenshot of custom message rule as follows:

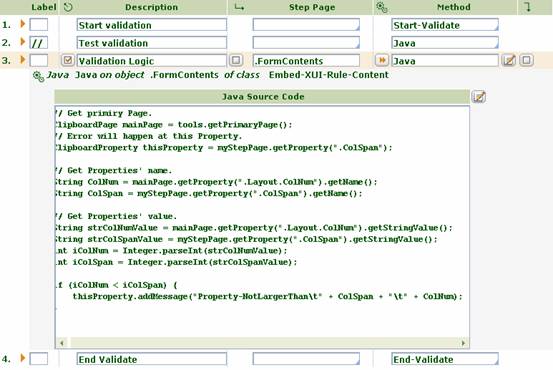
2. Create a new Activity, it is named Validate, apply to the rule you want to validate.
The Activity’s name must be “Validate”. When you are saving a rule, you can find the validation Activity is excused automatically in Tracer.
Generally, validation Activity contains three main parts, Start-Validate, Java, End-Validate. Start-Validate and End-Validate must be used together. Message logics are handled in Java step. This step can use the method Property-Set-Message instead if the logic is simple and the message rule has no argument. At this step, the key function is ClipboardProperty.addMessage, ClipboardProperty is the property you want to add the message. You can use it like this:

Ok, that is all. If any errors are captured, the error message will appear.

Copyright by Zolly in Cognizant.